Category: diy
You are viewing all posts from this category, beginning with the most recent.
An Appliance Installation in Four Lowe’s Trips
Setting: a local homeowner has an old dishwasher that is dying. A new dishwasher was delivered and is sitting in the garage, waiting to be installed.
Lowe’s Trip #1: Electrical Stuff
The old dishwasher had just a raw electrical cable coming from the unit. The wire ran through a hole in the floor and was connected up to the breaker box in the basement using wire nuts. The new dishwasher has a proper electric plug. So on the way home from work I hit Lowe’s for a grey electrical box, a GFCI plugin, and an outlet cover plate.
Came home, wired up the box before dinner. Got out a big drill bit and expanded the hole in the floor to fit the big plug.
Lowe’s Trip #2: Water line
I don’t do plumbing work that often, but when I do, it’s the little latent leaks that make me nervous. I read the installation manual for the dishwasher and it suggested “hook up the water line, turn on the water, and check for leaks before putting the unit in place”. Great idea, I thought. However, the existing water line wasn’t long enough to make that work.
Hit Lowe’s again, bought a longer water line. Hooked it up to the dishwasher. Ran the hose down through a separate hole in the floor, hooked it up to the water pipe in the basement. Turned the water on. No leaks.
Ran the electric plug end through the hole in the floor, plugged it in. We have power. Now we just need to hook up the drain hose.
The drain hose boot is marked that it will accommodate up to a 7/8” pipe. The PVC drain pipe plumbed up to the dishwasher location is marked 3/4”, but it turns out that’s 3/4” inside diameter. Outside diameter is a solid one inch. And the rubber boot doesn’t stretch that much.
Lowe’s Trip #3: Drain Pipe Fitting
Perused the PVC aisle. Then to the next aisle over with kitchen plumbing supplies. A “standard” dishwasher install would have it near the sink so the drain hose could tie in to the sink drain. Ours is on the opposite side of the kitchen, so whoever did the first dishwasher install here (sometime well after the house was built in 1959) ran the PVC drain line down through the floor and across the basement ceiling to tie in to the drain there. But I digress.
On the second trip through the PVC aisle, my wife notices the exact fitting we need. Sized to fit the 1” outside diameter pipe on one end, with a tapering ribbed end opposite it to grab a drain boot. I knew I had PVC glue at home, so paid for the fitting and headed back.
Grabbed the cans of PVC primer and glue from the basement. Opened up the primer and primed both pieces. Opened up the glue. It had solidified into jelly. Read the instructions on the back of the can. “Do not use if glue has hardened.” Deep, frustrated sigh.
Lowe’s Trip #4: PVC Glue
I know exactly where it is after perusing the PVC aisle less than twenty minutes previous. Head back home.
Glued up the fitting to the drain pipe. Let it sit for twenty minutes to harden up. Hooked up the drain hose. Carefully slid the dishwasher back into its slot. Confirmed that the hoses weren’t kinked. Nervously checked for drips under the water line fitting a couple more times. Still seemed ok.
PVC glue said to wait two hours before putting any pressure on the joint. Two hours later was getting close to bedtime, so we put the unit on the quick cycle to try it out. Had a minor heart attack when the display turned off every time we shut the dishwasher door. Found the full manual online and discovered that was by design. Let it run. 60 minutes later: clean dishes.
Here’s hoping I don’t have to repeat that task any time soon.
Weekend project: bookshelves!
One of the challenges a significant reading habit provides is where to keep all your books. While nearly all my fiction and a portion of my non-fiction comes from (and goes back to) the public library, when it comes to theology I still end up buying a fair number of books. And since book sales are no respecter of reading plans, my book inventory grows regularly as book inventories are wont to do.

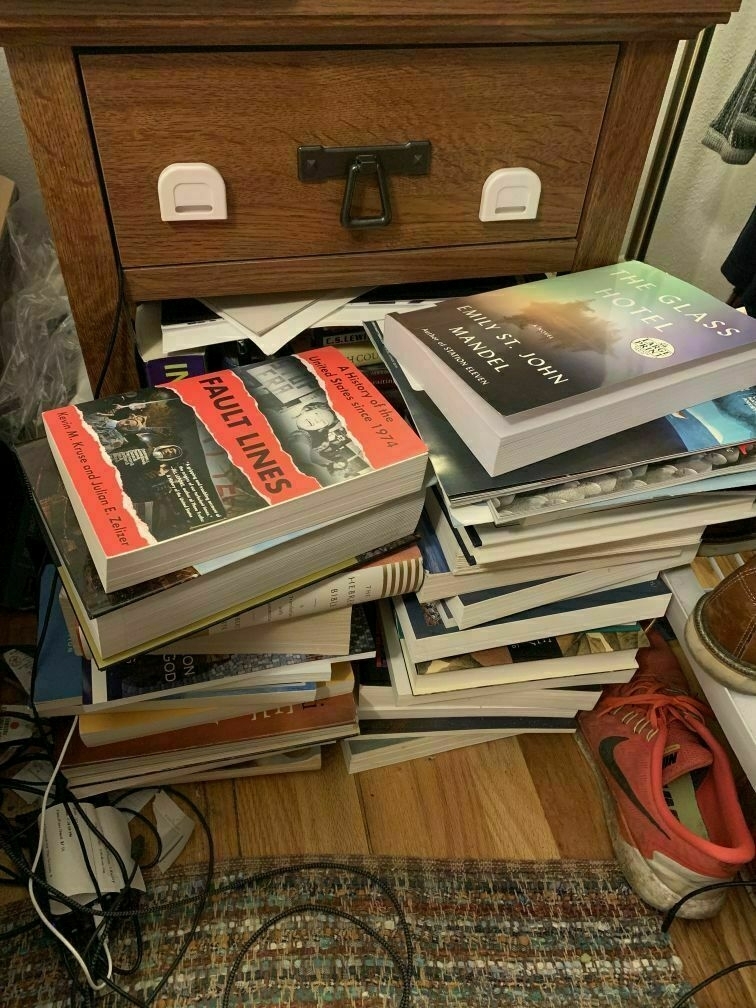
For the past several years my to-read pile has grown next to my bed. It started on the shelf under my bedside stand, then became two piles on that shelf, then added a pile in front of the bedside stand, and then a second pile next to that one. This approach became not just a tripping hazard but also a purchasing hazard (I have bought at least a couple duplicates) and a reading hazard, since it’s very easy to forget what you have available to read when it’s buried in a pile.
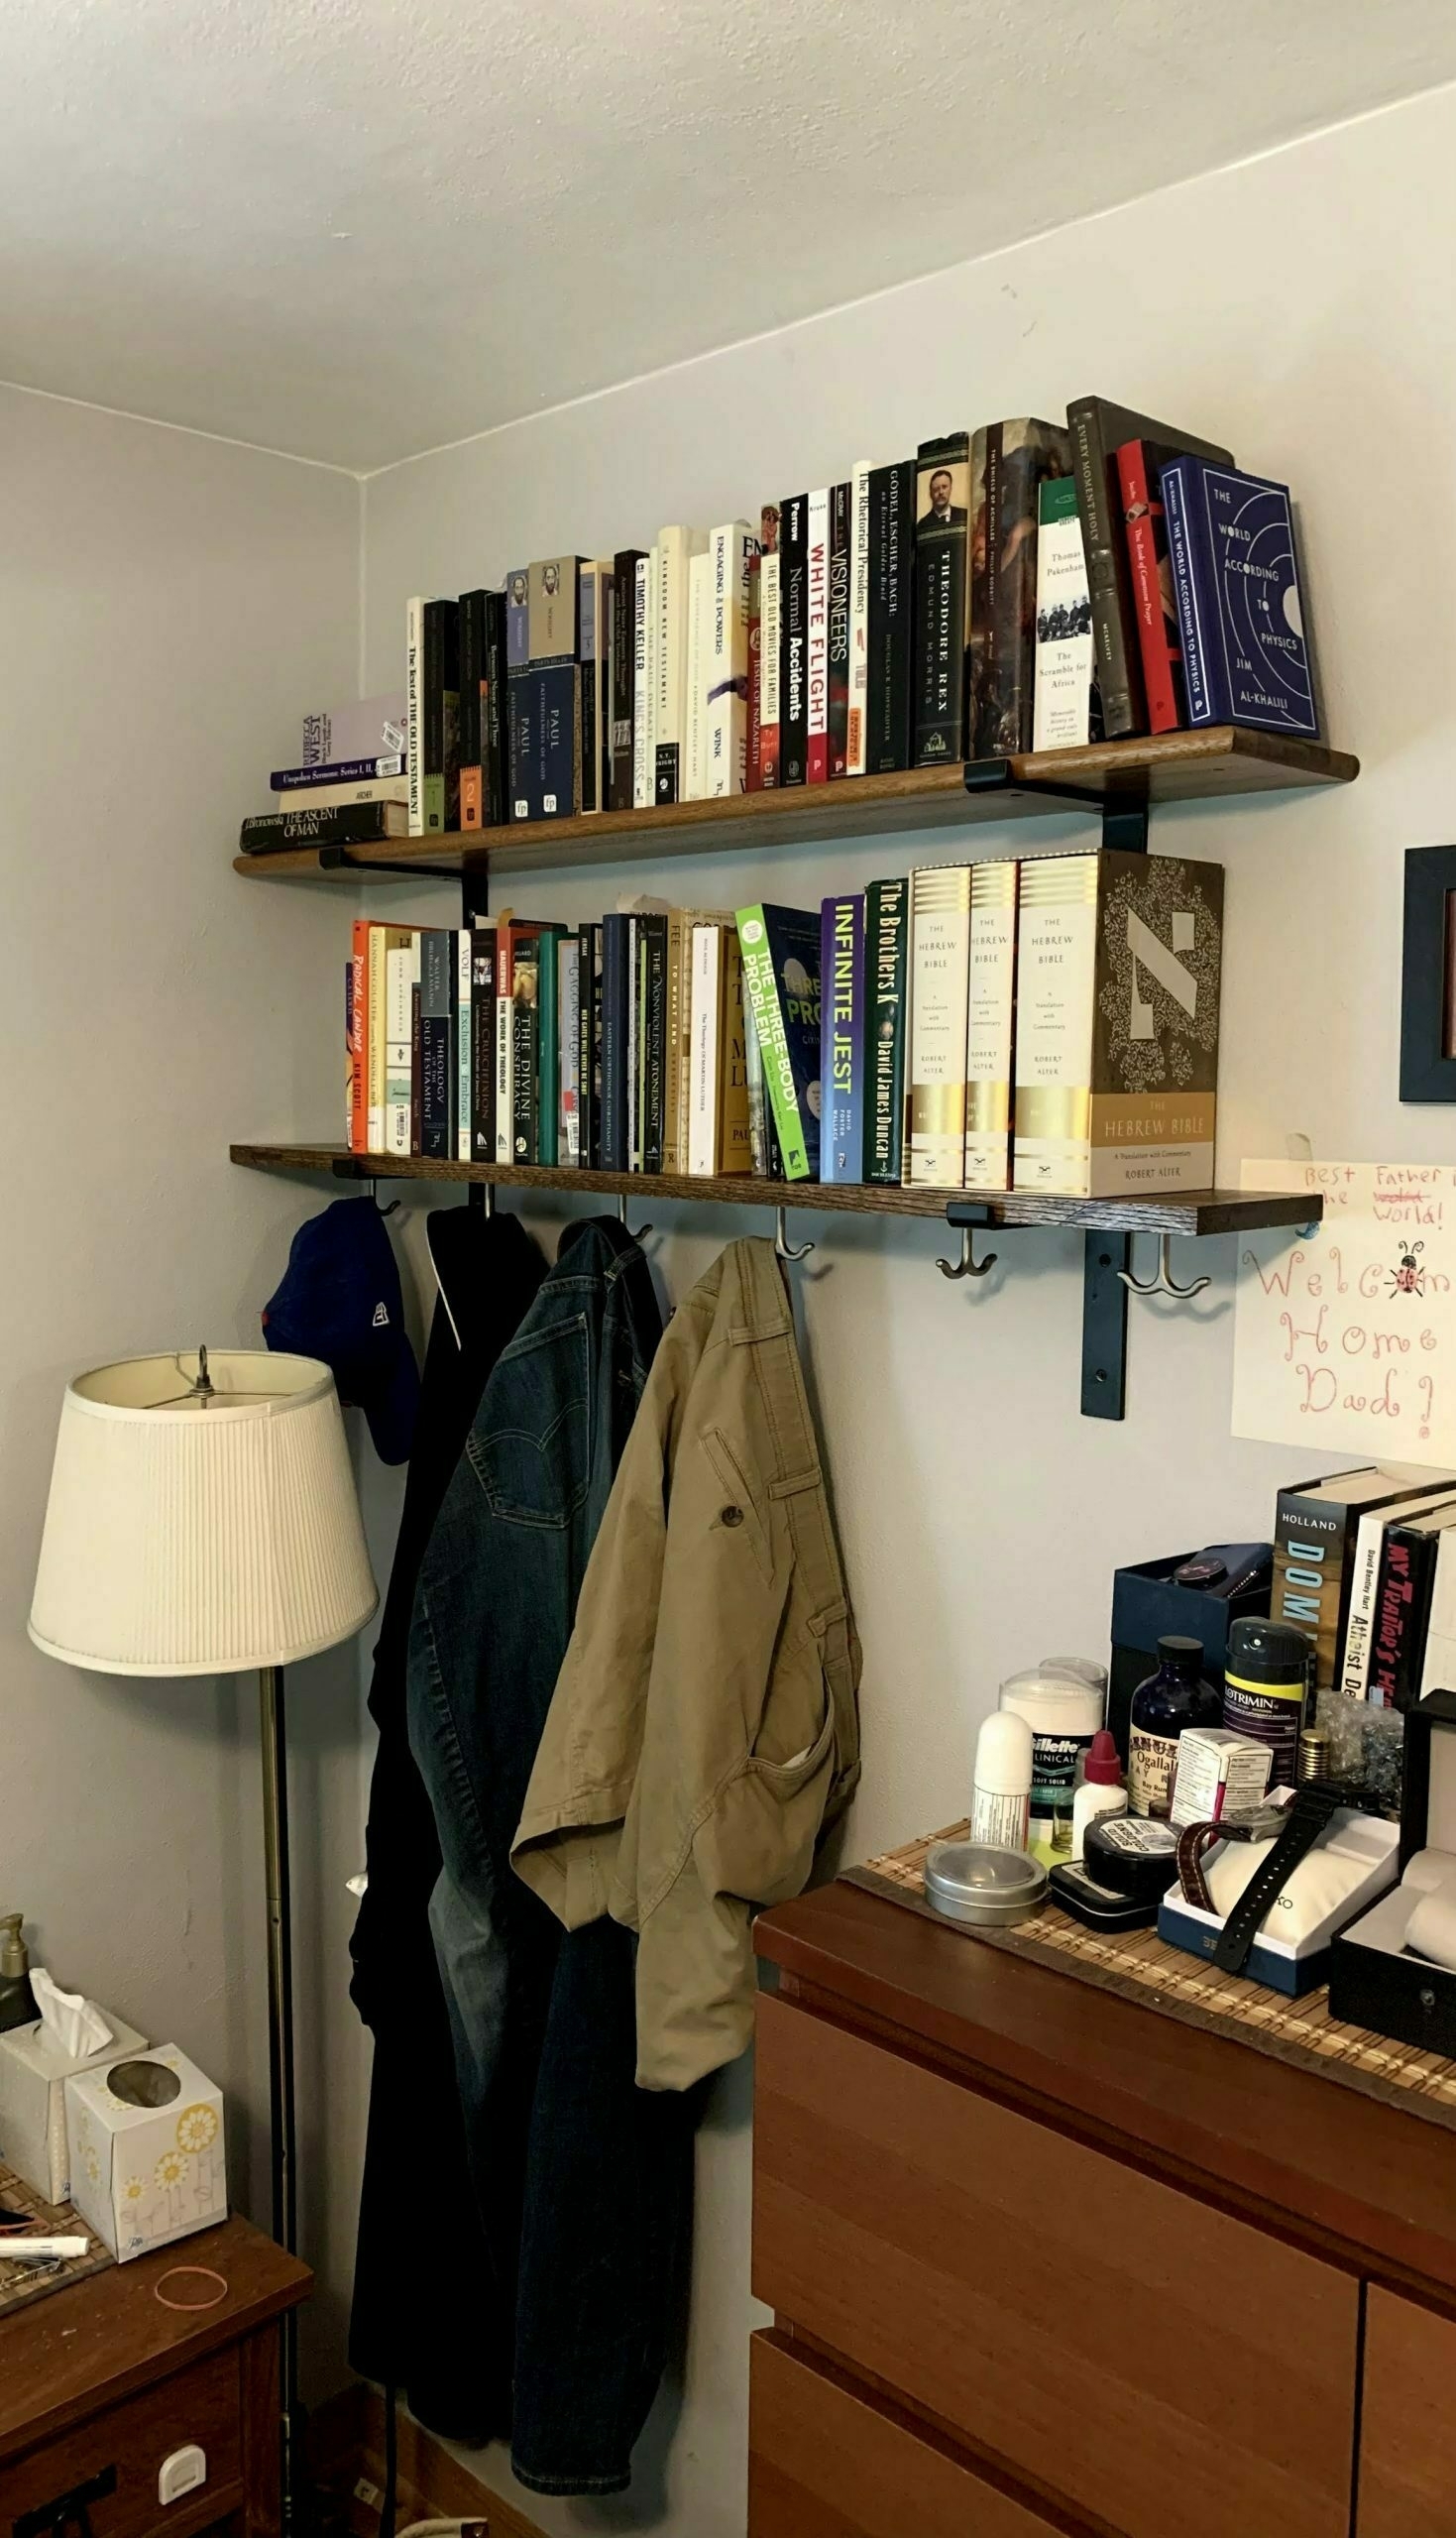
This weekend provided time to finally do something about it. Becky helped turn my initial concept into something actually workable for our bedroom, and this afternoon I was able to put up two shelves and populate them with books.

A row of hooks under the lower shelf provide convenient spots for a robe and pajamas, and with the books right in my line of sight every day I will have regular opportunities to be reminded of books I own and want to read. (And to be reminded of how many unread books I have and that I should really think twice before buying another book.)
The shelves are simple from a design standpoint. Shelf brackets from Home Depot purportedly hold 150+ lbs per pair. They are well anchored into the wall - one side directly into the studs, the other side using heavy-duty drywall anchors into a double layer of drywall. As an engineer I’m fairly certain I over-designed them and they’ll hold up just fine; as a cautious engineer I’ll still be mildly nervous for a week or two until I get comfortable that they are, indeed, holding up.
Now I have some reading to do.
(Yes, I know I have Infinite Jest on the shelf. And that it’s a book everybody buys and nobody actually reads. I read about 50 pages of it once. Maybe I’ll get back to it. It’s a sunk cost at this point.)